Win7
Contents
Introduction
Windows 7 is a personal computer operating system developed by Microsoft. It is a part of Windows NT family of operating systems. Development of Windows 7 started as early as 2006 under the codename "Blackcomb." Windows 7 was released to manufacturing on July 22, 2009, and became generally available on October 22, 2009, less than three years after the release of its predecessor, Windows Vista. Windows 7's server counterpart, Windows Server 2008 R2, was released at the same time.
Windows 7 was primarily intended to be an incremental upgrade to the operating system, intending to address Windows Vista's critical reception (such as performance improvements), while maintaining hardware and software compatibility. Windows 7 continued improvements on Windows Aero (the user interface introduced in Windows Vista) with the addition of a redesigned taskbar that allows applications to be "pinned" to it, and new window management features. Other new features were added to the operating system, including libraries, the new file sharing system HomeGroup, and support for multitouch input. A new "Action Center" interface was also added to provide an overview of system security and maintenance information, and tweaks were made to the User Account Control system to make it less intrusive. Windows 7 also shipped with updated versions of several stock applications, including Internet Explorer, Windows Media Player, and Windows Media Center.
Configuration
- View Windows Registry
launch in cmd.exe the command: regedit
- Remove from Library folder from desktop
remove the register key:
[HKEY_LOCAL_MACHINE\SOFTWARE\Microsoft\Windows\CurrentVersion\Explorer\Desktop\NameSpace\{031E4825-7B94-4dc3-B131-E946B44C8DD5}]
Bootable USB Key installer
- Step 1: diskpart
list disk
select disk {diskNumber}
clean
create partition primary
select partition {partitionNumber}
active
format quick fs=ntfs label="Recovery"
assign
exit
- Step 2: copy Windows 7 files
- Step 3: change windows type
http://www.askvg.com/how-to-choose-desired-windows-7-edition-version-during-setup/ remove source/ei.cfg to be able to display win7 type selection On some bios computer if there is no ei.cfg it will block installation ....
WAIK
- Link to Windows Automated Install Kit
http://www.microsoft.com/downloads/details.aspx?familyid=696DD665-9F76-4177-A811-39C26D3B3B34
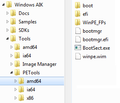
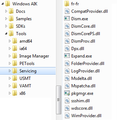
- list of installed files:
- Description:
- Tools: .wim tool management
- Winpe: Environnement of Windows pre-install
- Image manager: Manage .wim under Windows
- Servicing: .wim tool management
- VAMT: remote CDKey management
Make a .wim file from an existing windows
- start
c:\windows\system32\sysprep\Sysprep.exe
- select:
Enter System OutOfBox Experience
Generalize (inlink windows from drivers)
Shtudown option reboot
- in dos launch command (imagex is in WAIK)
E:\imagex /compress fast /check /flags "Win7 Pro" /capture c:\ d:\win7-kw5.wim "Win7 Pro" "Win7 KW5 Dev"
Convert .wim to .iso
Get Microsoft AIK tools
http://www.microsoft.com/downloads/details.aspx?familyid=696DD665-9F76-4177-A811-39C26D3B3B34
copy tools to Win7Custom\_tool (for example can be any folder)
start the convertion commande from .wim to .iso
cd C:\Win7Custom\_tool\amd64\
oscdimg.exe –bC:\Win7Custom\boot\etfsboot.com -lWIN_EN_DVD C:\Win7Custom\ C:\Win7.iso  –u2 -m –h
Create a live USB Windows 7
http://www.intowindows.com/how-to-install-windows-7-to-usb-external-hard-drive-must-read/
http://www.intowindows.com/how-to-install-windows-7-on-usb-flashhard-drive-easy-way/
Change windows type (didn't worked for me)
http://mp7000.deviantart.com/art/Windows-7-Enterprise-Downgrade-159805048
Crack password
WoWLan
Wake on Wireless LAN (WoWLAN) configuration
- official link
https://technet.microsoft.com/en-us/library/ee851581(v=ws.10).aspx
To enable WoWLAN, you need to create a DWORD register value:
Key Name: EnableWoWLAN
Type: DWORD
Path: HKEY_LOCAL_MACHINE\SYSTEM\CurrentControlSet\Services\NativeWifiP\Parameters
Value: 1
Once modified, the network card need to be configured to:
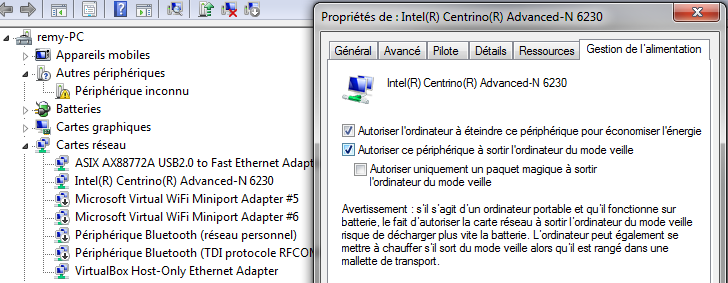
- Open Device Manager.
- Right-click the network card you want to configure and select Device Properties.
- In the Power Management tab, select the Allow this device to wake up the computer check box.
the computer will now answer to request "GTK rekeying" and "EAP request-identity packet".
- Ui Tools to send "magic packet"
- Proxy WOL
to send "magic packet" from internet to intranet, you need to enable the Proxy WOL functionnality in the network router


